
When you buy through links on our site, we may earn an affiliate commission at no extra cost to you. This helps support the content we love creating for you. Our recommendations are based solely on what we believe will enrich our readers lives and are not influenced by commissions or sponsorships.
Have an event on the horizon and want to create a show-stopping entryway? Whether you're planning a wedding, baby shower, graduation, or birthday bash, a personalized event sign is your secret weapon for setting the perfect tone!
Custom event signs do more than just look fabulous—they help guide your guests, set the mood, and build excitement for all the fun to come. Plus, they make an adorable backdrop for special photos with your favorite people.
Worried about the cost? No need! You can skip the designer fees by using a DIY editable sign template. Just customize it to match your event’s theme, send to a popular printing company, and voilà—your event will have a professional-looking entryway on an everyday budget!
Ready to dive in? Here’s a quick guide on using DIY event sign templates.
Step 1: Pick Your Perfect Template
First things first, choose a custom sign template that speaks to your style. The Humble Host offers an array of custom event sign templates in different styles and themes that are ready for your personal touch!
Click to see our Event Sign Templates
Step 2: Personalize Your Sign
After you've purchased your template, it's time to make it yours!
• Access Your Temeplate: Go to Corjl to access your template.
• Insert a Photo: Replace the placeholder pic with a snapshot capturing the essence of your guest(s) of honor!
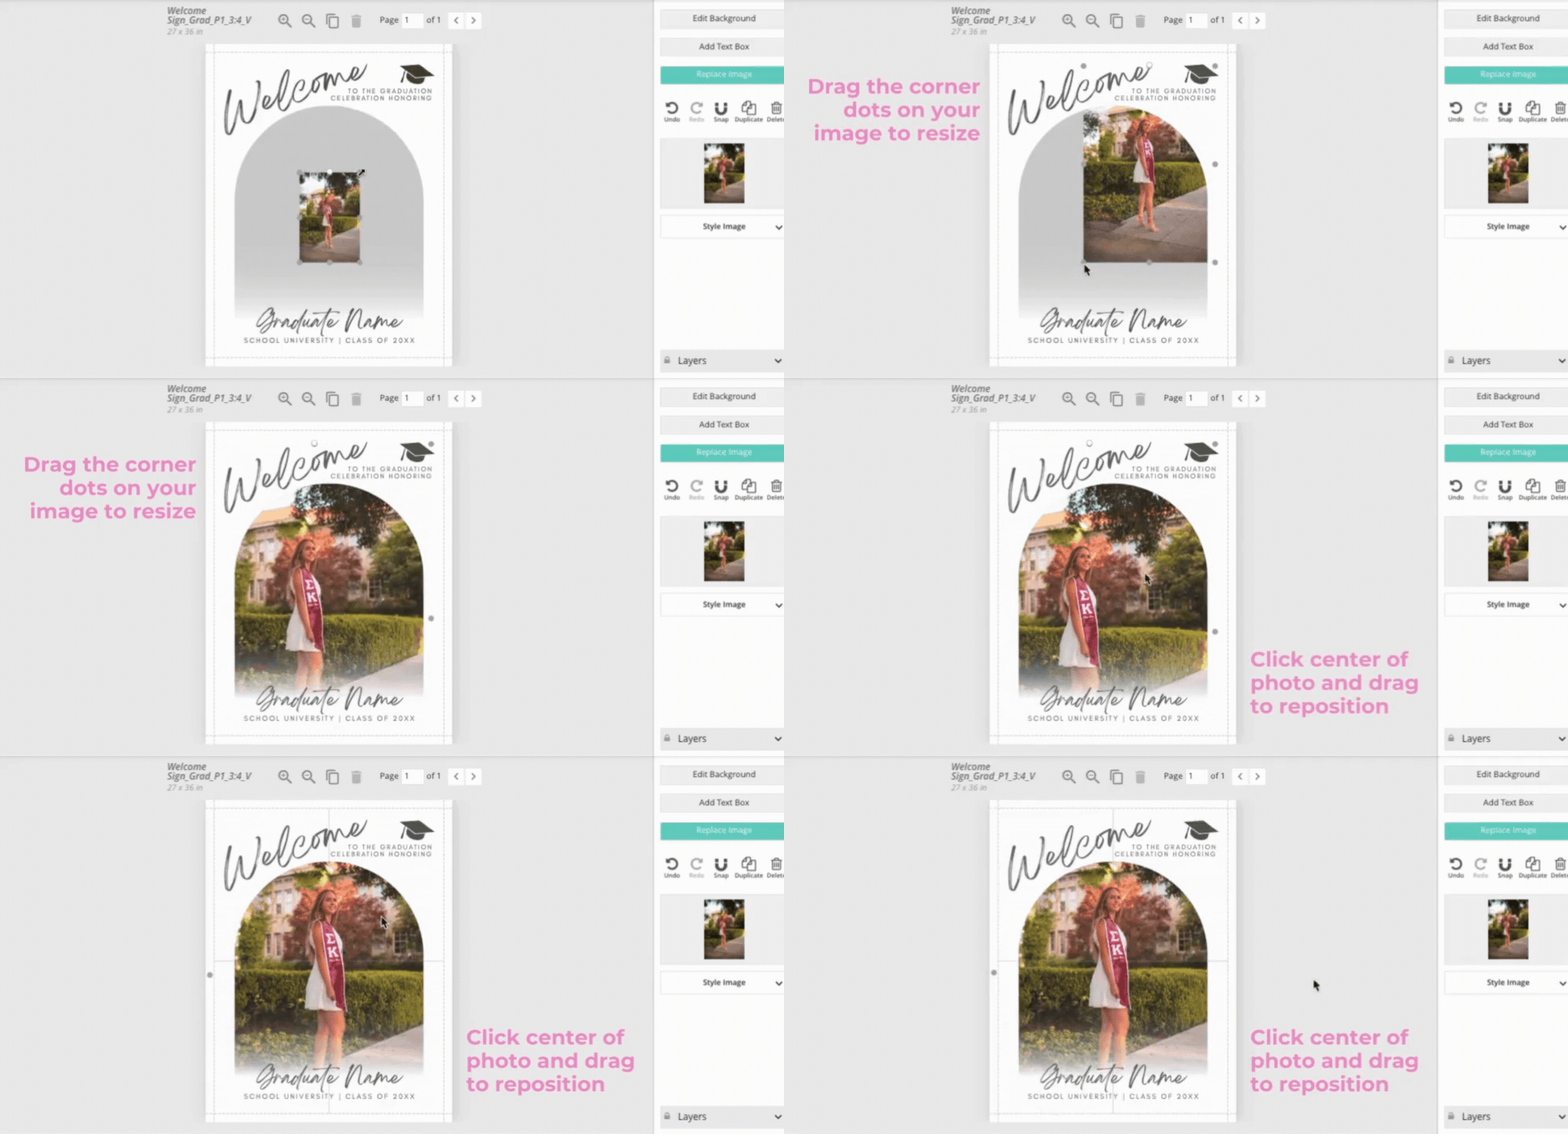
In the template, click on an existing placeholder image to select it, then in the right menu bar, click the "Replace Image" button.

Drag the corner dots on your image to make it fit the template.
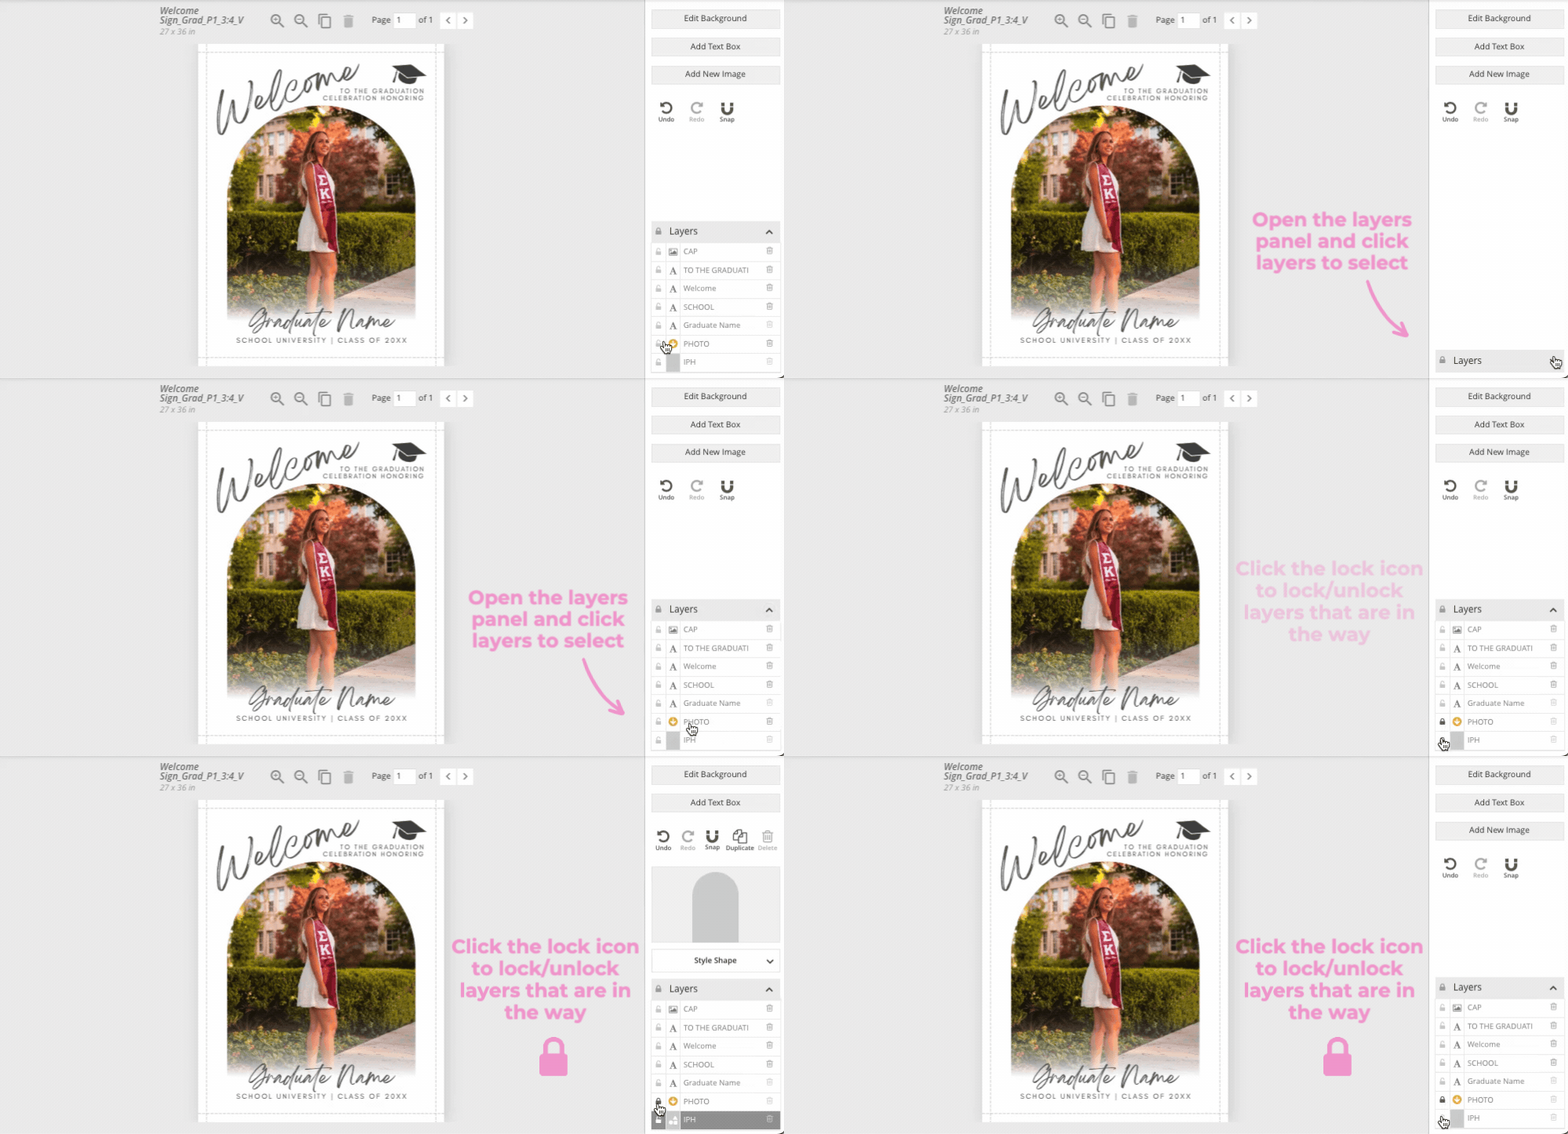
Note: If you have trouble selecting an image withing the template, go to the layers panel on the right to select it. If other elements are getting in the way, temporarily lock those layers by clicking the padlock icon.
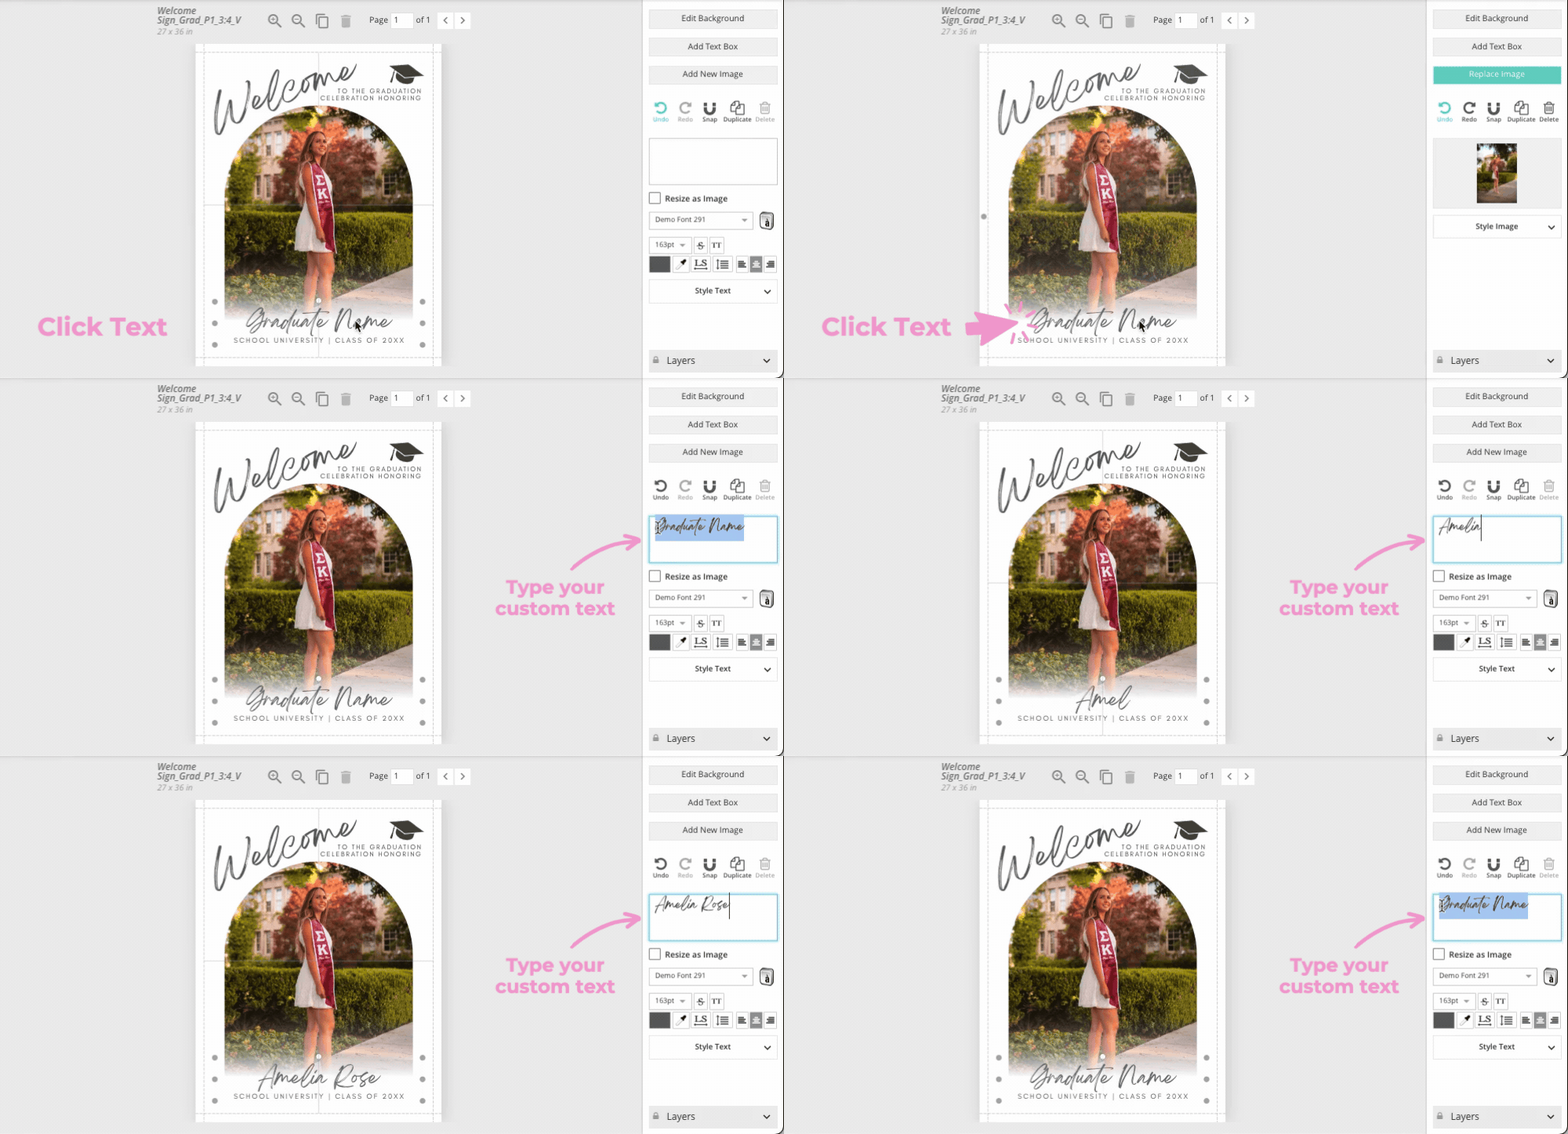
• Customize Text: Make it yours by swapping the default text with details about your event, the guest of honor's name, or any personalized message you wish to feature on the sign.
Click the existing text to select it, then enter your text in the upper right text box. Repeat for all text areas.
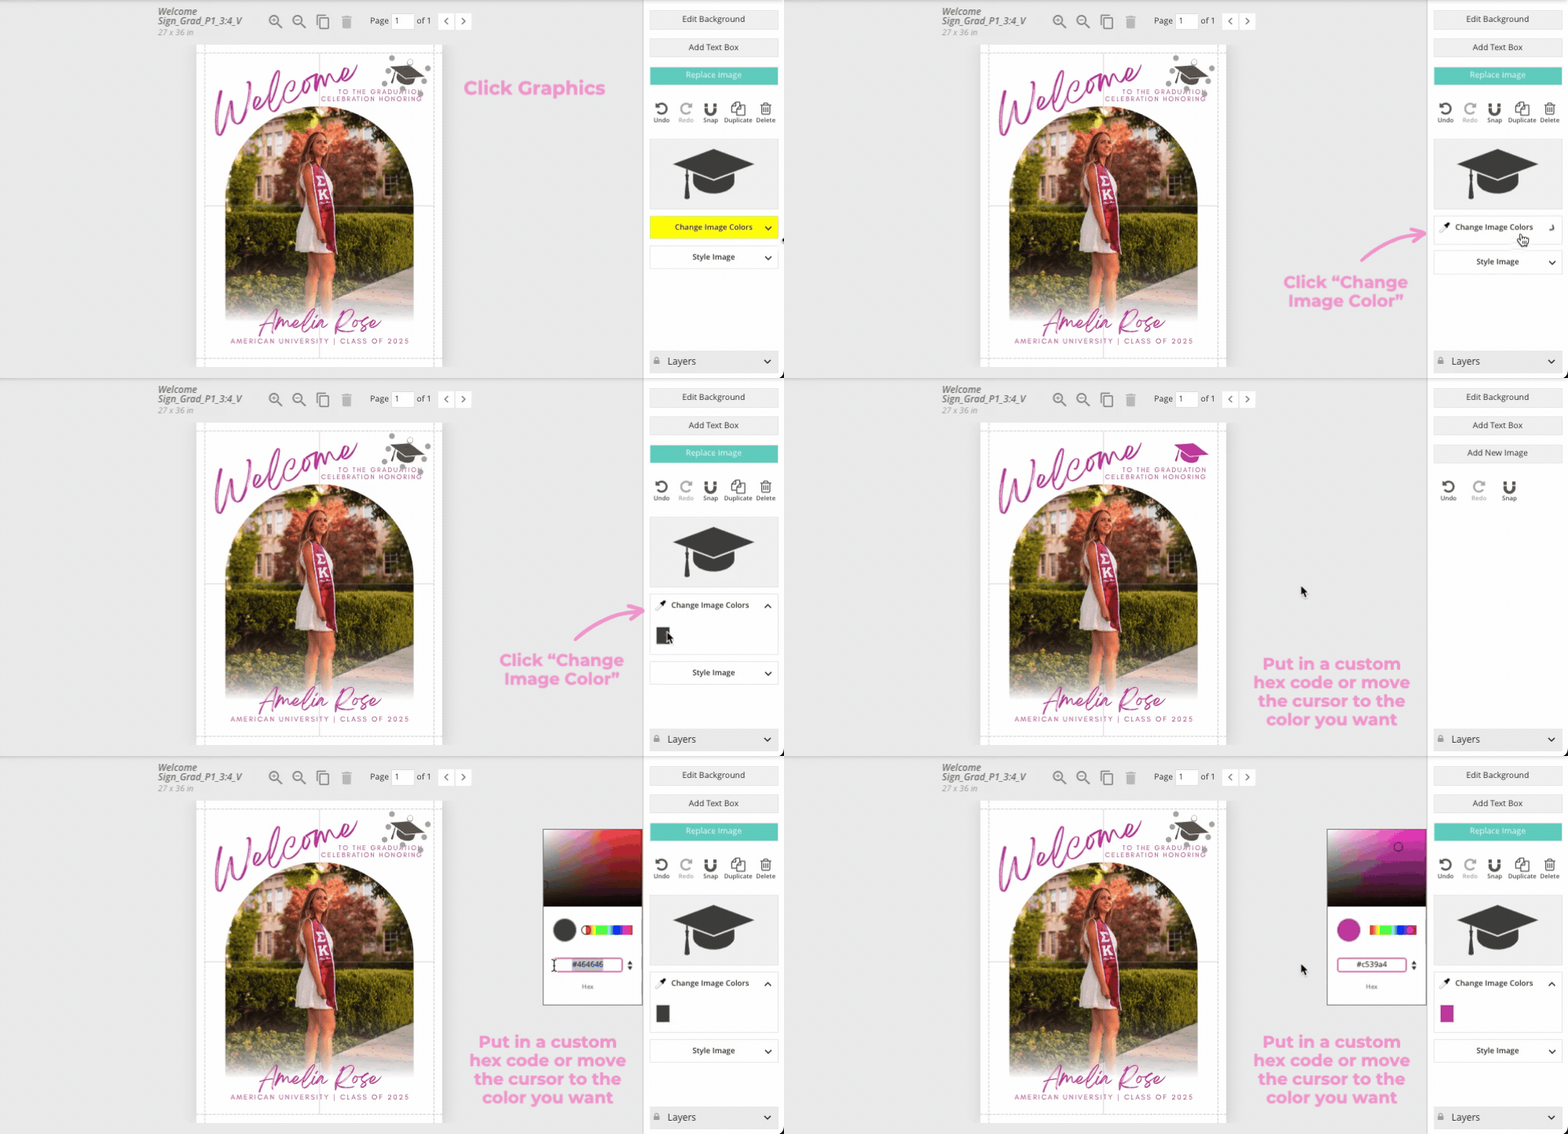
• Tweak the Appearance: Customize colors, fonts, and design elements to perfectly complement your event theme. Make it uniquely yours! (Note: some elements may be locked to preserve design integrity.)
Click on text and use the options in the right menu bar to adjust fonts, colors and styles.
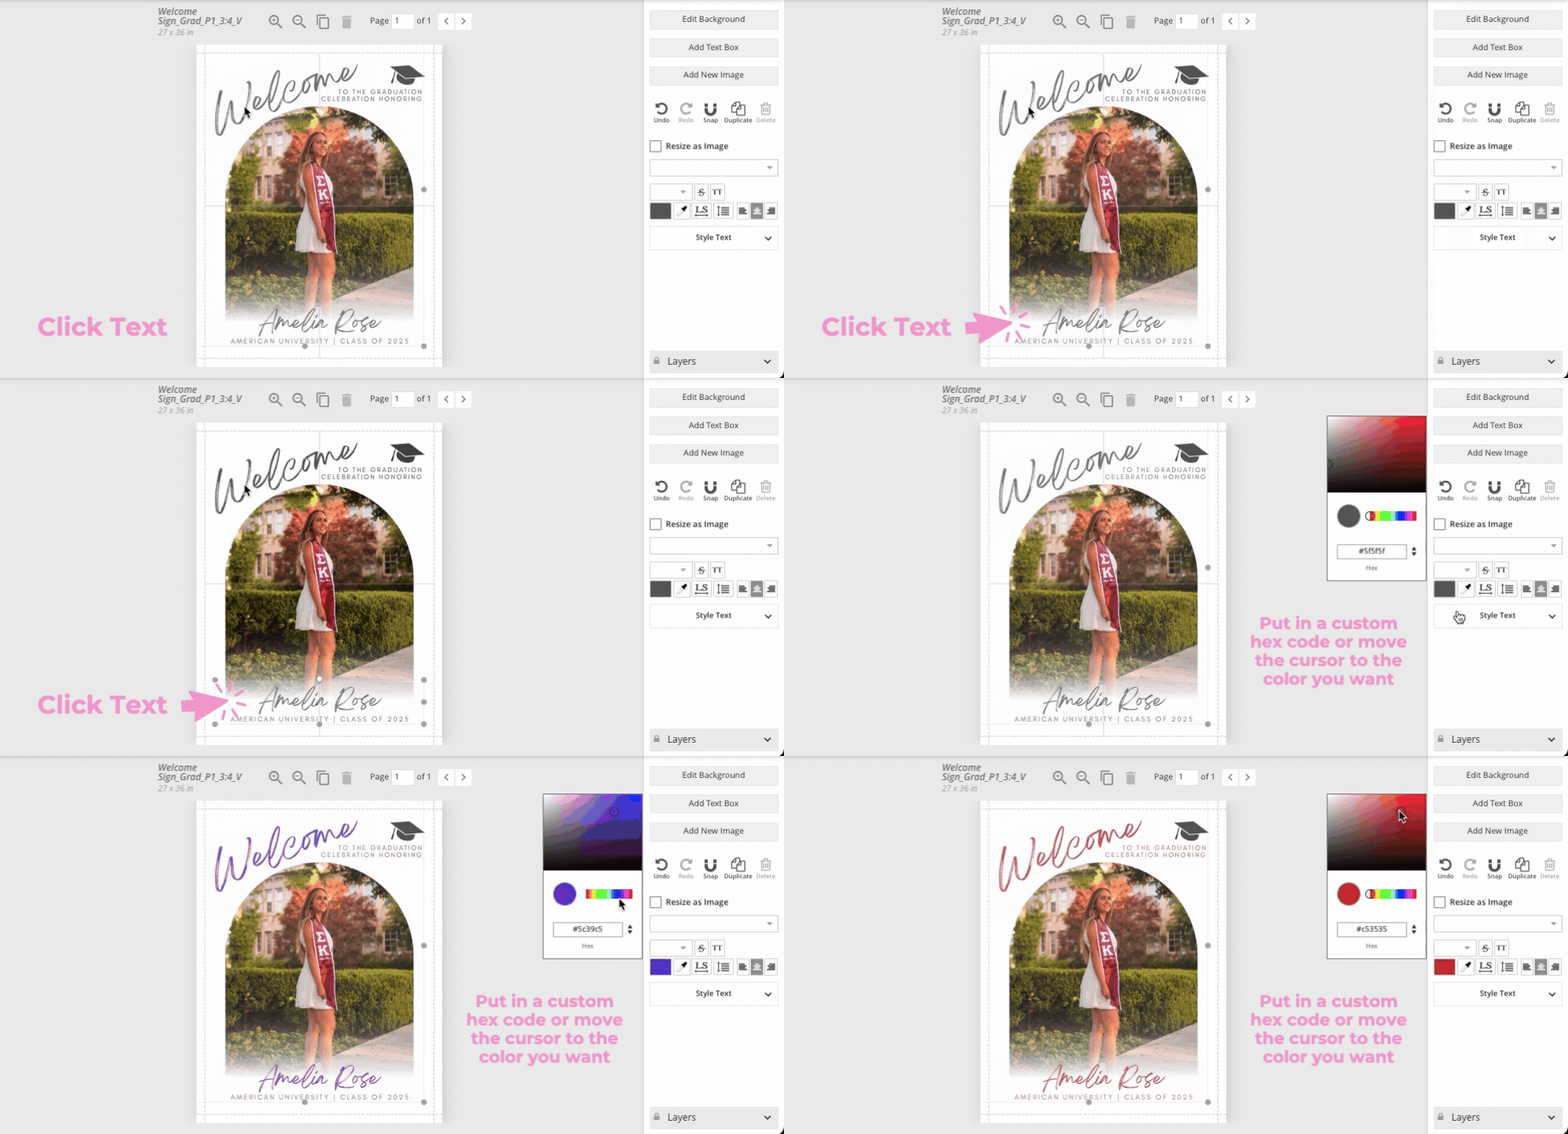
Click on graphics and use the options in the right menu bar to adjust the colors.
Step 3: Print Like a Pro
Bring your sign to life in just a few clicks! Download your finished design and upload it to an online or local print shop. Whether you're after a great deal or a speedy turnaround, a quick online search will reveal plenty of printing options. Here are a few we recommend.
• Online Printing Services: Visit the website of your preferred online printing service to upload your design. Choose from different finish types such as glossy or matte, and explore other customization options they have available. Once you've placed your order, kick back and wait for your beautifully printed sign to arrive!
Here are a few online printing services we like:
Prints of Love | VistaPrint | UPrinting | GotPrint | Signs.com
*Pro tip: Once you've finished editing your template, print effortlessly by clicking the "Order Prints" button in Corjl. This will connect you with our printing partner Prints of Love. Receive 10% off your order with our coupon code: THEHUMBLEHOST
• Local Print Shops: Local print shops make it super easy to print your designs—you can upload them online and swing by to pick them up, or, in some cases, just walk in for instant printing. The best part? You'll get your prints faster and save on shipping costs. Search online to find a shop near you.
If you're located in the US, here are a few popular options:
Staples | OfficeDepot | Walgreens | CVS | Walmart | Minunteman | FedEx
Step 4: Plan Your Display
Event signs look amazing on their own, but you can easily take them to the next level by dressing them up for even more impact. Here are some fun ideas to consider.
• Easels and Stands: Since event signs are flat, you'll need a stylish way to display them. Easels are a super convenient option for this, and the best part? You can find easels that perfectly match your event décor! Whether you go for a sleek metal stand, a rustic wooden easel, or a chic acrylic display, it's an effortless way to showcase your sign and keep it looking fabulous. Plus, an easel adds a touch of elegance and ensures your sign is front and center where everyone can see it!
• Add a Frame: Surround your sign with a decorative frame to give it a polished look. Choose colors and styles that match your event theme for extra flair!
• Incorporate Lights: String lights or LED accents can make your signs pop, especially in dim or evening settings. A bit of sparkle goes a long way!
• Balloon Backdrop: Fancy balloon structures are all the rage these days and provide a cost-effective way to visually accentuate your décor.
• Attach Fun Props: Decorate your sign with props that match your event’s theme—think mini bunting, glitter, or themed icons.
Step 5: Enjoy Your Event!
And there you have it—a stunning DIY sign that’ll wow your guests and elevate your event, all while staying within budget.
For more custom templates and ideas to create a beautifully cohesive event, visit The Humble Host Shop.

.png)


